
This week’s recipe was inspired by my high school days. During my senior year in high school I started working at a Baskin-Robbins. Although I would never work at a Baskin-Robbins again, at the time it was a pretty good job for someone in high school. It required little-to-no brainpower, I got to work with a lot of my friends, and I ate ice cream every day.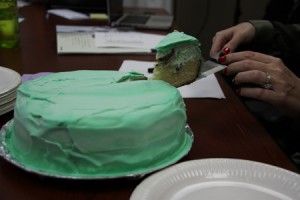
One of the things that I had to do besides scoop ice cream — years later my right forearm is still so much stronger than the left because of months of ice cream scooping — was help make clown cones, ice cream pie and ice cream cakes.
Clown cones were really annoying to make because of the decoration required. A clown cone is an ice cream cone that is flipped upside down on a cookie so as to make the cone look like a hat. Then all you need to do is add a face, ears and hair. Often my clown cones ended up cross-eyed looking like they were wearing a bad weave.
Ice cream pies were not so bad, but sometimes it was annoying to have to deal with the different things that go on top of the pie.
Ice cream cakes, on the other hand, were always fun to make, unless it was a chocolate cake. When I made cakes, all I had to do was to add a layer of ice cream on top of some cake. The more difficult ones to make were anything that was a full sheet or bigger. Technically a full sheet was 32 scoops of ice cream, so you can imagine how many more scoops anything bigger would require. The worst cakes to make were the ones with chocolate ice cream. Chocolate ice cream melts at a faster rate than any other ice cream, making it more difficult to manipulate.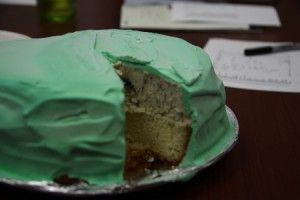
It had been a long time since I had made an ice cream cake, and I really wanted to see if I was capable of making one without all the tools that Baskin-Robbins provides. It was also very timely since it was a special person’s birthday.
I went to the local grocery store and picked up the cheapest cake mix and ice cream I could find. Some things that I already had and didn’t buy were eggs, vegetable oil, flour, PAM, a pan to make the cake in and one cake spatula. I also waddled over to the dairy section and got whipped cream that comes in a carton container to frost the cake.
I had never made a cake before — the ones we used in Baskin-Robbins were sent to us frozen, so I required some assistance for this part. If there’s no one that can assist you, read the back of the box. Those directions tend to give you the desired results.
I put the cake mix in a bowl and added three eggs and half a cup of vegetable oil. I started mixing it all together and was very confused when the result was very thick. Luckily I remembered I had not added a cup of water to the mix. Who knows what kind of monster I could have created if I had not added the water.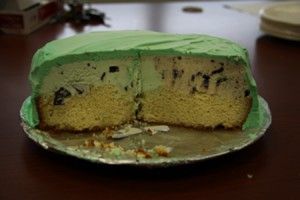
Before putting the mix in the cake pan, my friend sprayed the pan with PAM and had me sprinkle some flour on it. This would keep the cake from sticking to the pan.
We placed the pan with the mix in an oven that was preheated to 350 degrees and forty five minutes later, out came a cake. I let the cake cool down for a while before I moved on to phase two.
For phase two, you first need to cut off the top part of the cake. The smooth part won’t really let the ice cream hold on to the cake when you’re putting it on. Once the top had come off, I removed the cake from the pan and placed it on a plastic plate that was covered by aluminum foil. I took out the ice cream I was going to use, mint chocolate chip and Oreo cookies and cream, and I let it sit out for a little bit. It’s a lot easier to manipulate ice cream when it begins to melt a little — If only the SAC would melt …. (see story on B3).
I then scooped ice cream onto the cake. The better shaped your scoops are the easier it’ll be to mold the ice cream on top. Be sure to have a cup of water in which you can dip the scooper — water makes it easier to scoop ice cream. Once I had covered the entire cake with a top layer of ice cream, I began to give it some shape. For this I used a butter knife and simply began evening out the ice cream. In some places I had to add a little more ice cream so that it would be more even. It was easier to use the smooth parth of the butter knife rather than the side with ridges.
Once it was as even as I would be able to get it, I popped it in the freezer. Then I began to work on the whipped cream. This was hard. Unless you have one of those professional cake mixers that will keep mixing without you having to be there holding everything in place, this is going to be difficult. Why not use regular frosting? Because regular frosting does not freeze as well as the whipped cream.
I mixed the whipped cream as best I could, which wasn’t great, and added some food coloring to make it green. Once the cake was completely frozen, I took it out and began covering it with the whipped cream. I don’t remember this part being that difficult when I worked at Baskin-Robbins. However, since the whipped cream wasn’t as whipped as it should have been it was hard to manipulate it to cover the entire cake. After fighting the whipped cream, the cake was decently covered. Back in the freezer it went, and it’s done, unless you have some of those fancy cake decorators and want to have a field day with the cake. Take out the cake five to ten minutes before it’s going to be served, otherwise you’ll struggle cutting it.
The process of making a cake was definitely a stroll down memory lane, and surprisingly it ended up tasting really good